The Raspberry Pi is small, silent, and can connect to your home network. So it’s no wonder that the Raspberry Pi NAS box is a popular Pi project. Lucky for us, using your Raspberry Pi as an NAS box has never been easier. By using a Linux distro called OpenMediaVault, we can quickly and easily create a Raspberry Pi NAS box.
For the uninitiated, NAS means Network Attached Storage. With NAS, you can stash things on portable hard drives and other external storage devices via your network, meaning you don’t have to plug the USB storage directly into whatever device you’re using at the moment. It’s a convenient way to share files between devices (whether they’re all your own devices or they belong to multiple users) and to back up multiple computers.
How to use your Raspberry Pi as a NAS box
This is a pretty straightforward project. We’re going to get OpenMediaVault, install it on our Raspberry Pi, tweak a few settings, and plug in our external storage devices. For this project, you’ll need a Raspberry Pi (of course), the usual peripherals (screen, keyboard, mouse, microSD card), and a computer with an SD card reader. Naturally, you’ll also need your USB media storage devices – preferably self-powered ones with plenty of storage space for all your stuff.
Step 1: Download OpenMediaVault
Download the Raspberry Pi version of the operating system here. You want the one named omv_rpi2_rpi3_3.0.63.img.gz, or something like that (the numbers towards the end of the filename will change with future updates).
Step 2: Extract the disk image
Use your favorite program to unzip the file – I used 7zip, which you may remember from our guide to installing Raspbian.
Step 3: Write the OpenMediaVault disk image to your microSD card
We’ve done this with a other operating systems in the past – see our guide to installing Raspbian, for instance, for more details – but you can do this any way you’d like. Mac’s disk utility will work, as will Windows’ Win32 Disk Imager. Again, this is the same process as we’ve used with other operating systems, including Raspbian.
Step 3: Connect everything and boot up your Pi
Stick that nice new microSD card into your Pi and connect your Pi to your local network with an Ethernet cable. You’ll want to plug in your external storage devices, too, of course. Then go ahead and plug in your Pi’s power source. You’ll find that there’s no real installation process, and your Pi will spring to life with no trouble at all.
Step 4: Set up OpenMediaVault
When you boot up your Raspberry Pi NAS, OpenMediaVault will print your IP address:
To manage the system visit the openmediavault web control panel:
eth0: [IP address]
You’ll see your IP address instead of the part in brackets, of course. Jot that down and then head back to your computer. Open up the browser on your computer and type in your Pi’s IP address. You should find yourself in the control panel for your new Raspberry Pi NAS. Log in with the credentials admin (username) and openmediavault (password), and let’s do some configuring!
Step 5: Mount your disks
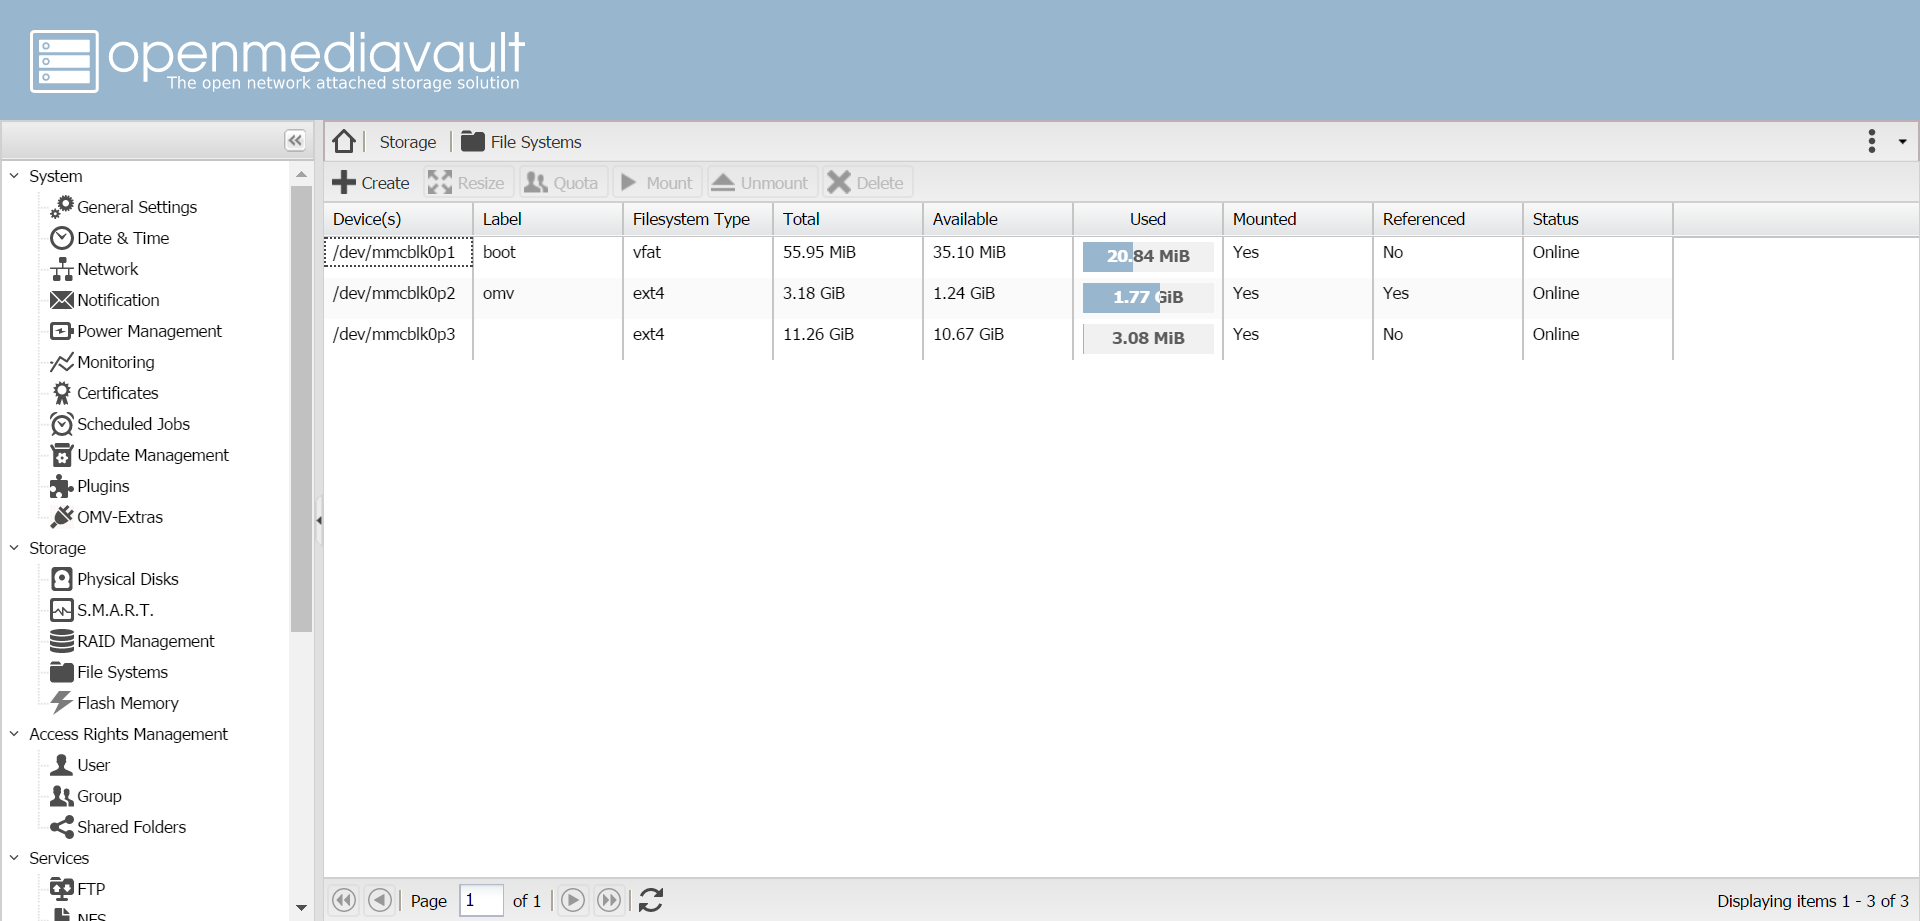
On the left-hand menu, click on File Systems (it’ll be under the Storage heading). You’ll see your USB storage devices in the Device(s) column. Just select one and (assuming your device isn’t already mounted) hit Mount, then (after a moment) Apply. That’s it!
Step 6: Create shared folders
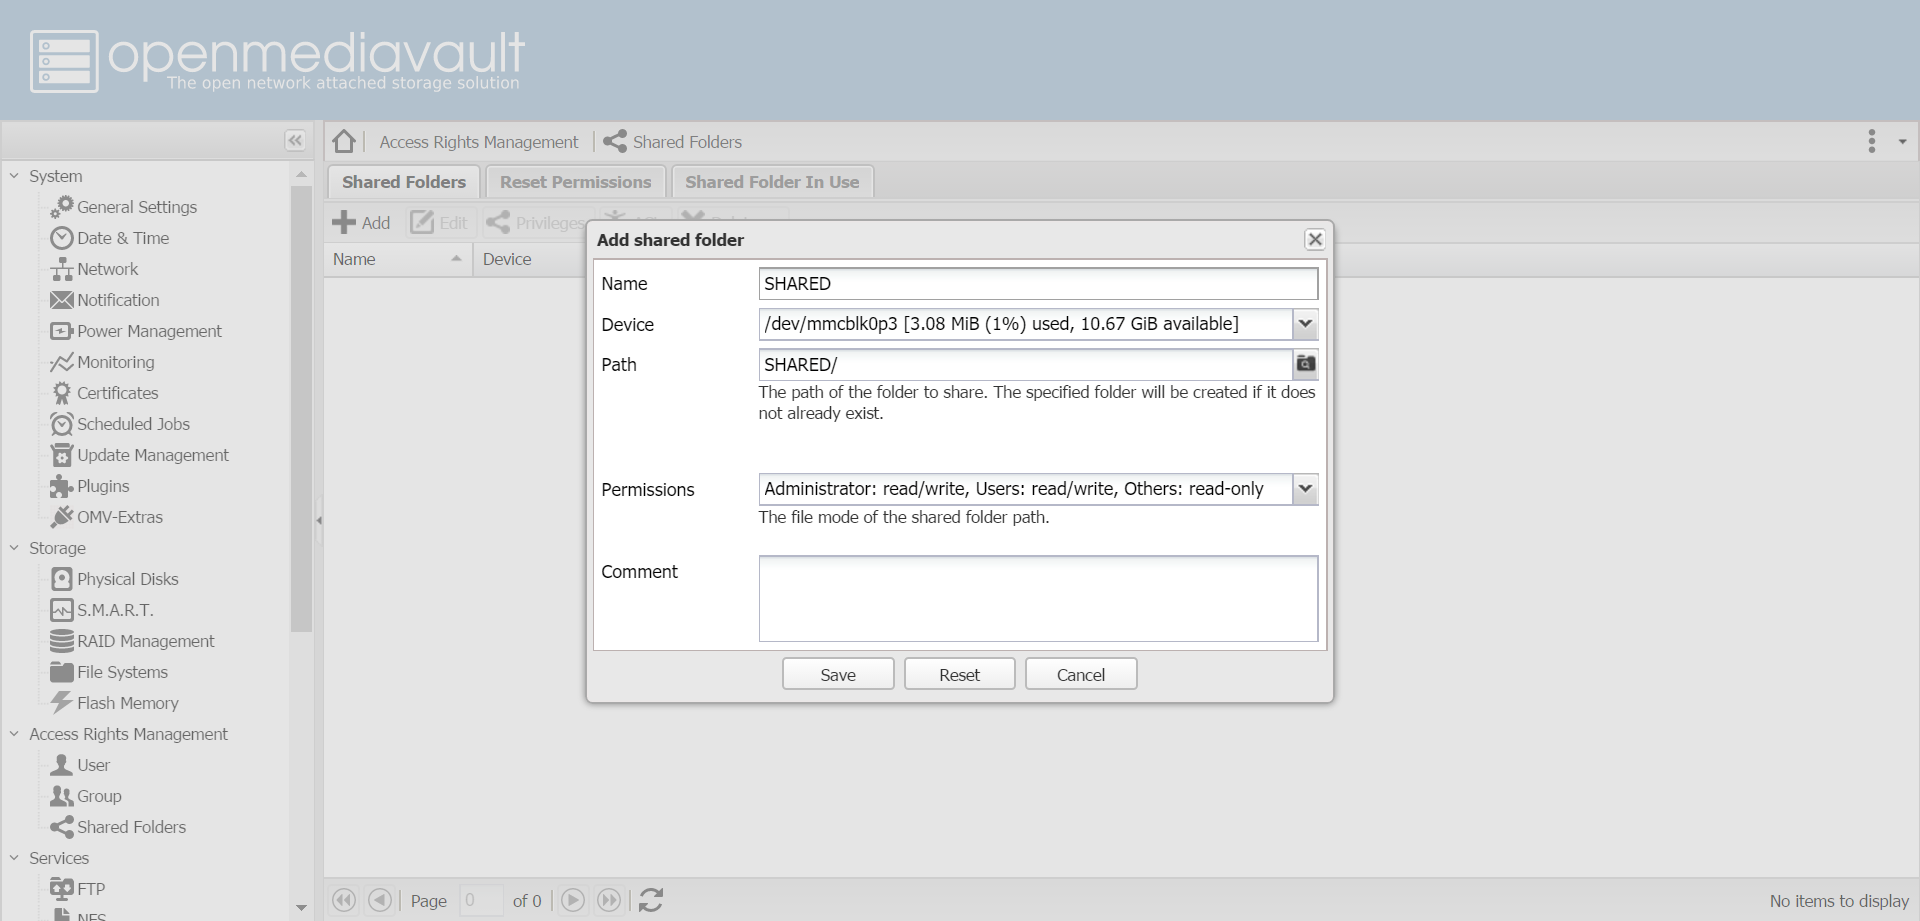
The whole point of this adventure is to make your files available to multiple devices on your network. To do that, we need to create shared folders.
Back at the main navigation menu, click Shared Folders (of course!). It’ll be under Access Rights Management. Just hit Add to get started – you’ll be able to name a folder, choose what storage device it lives on, and specify a path for it (you can just keep the name as the path, too). Click Save when you’re done.
Step 7: Enable SMB/CFIS
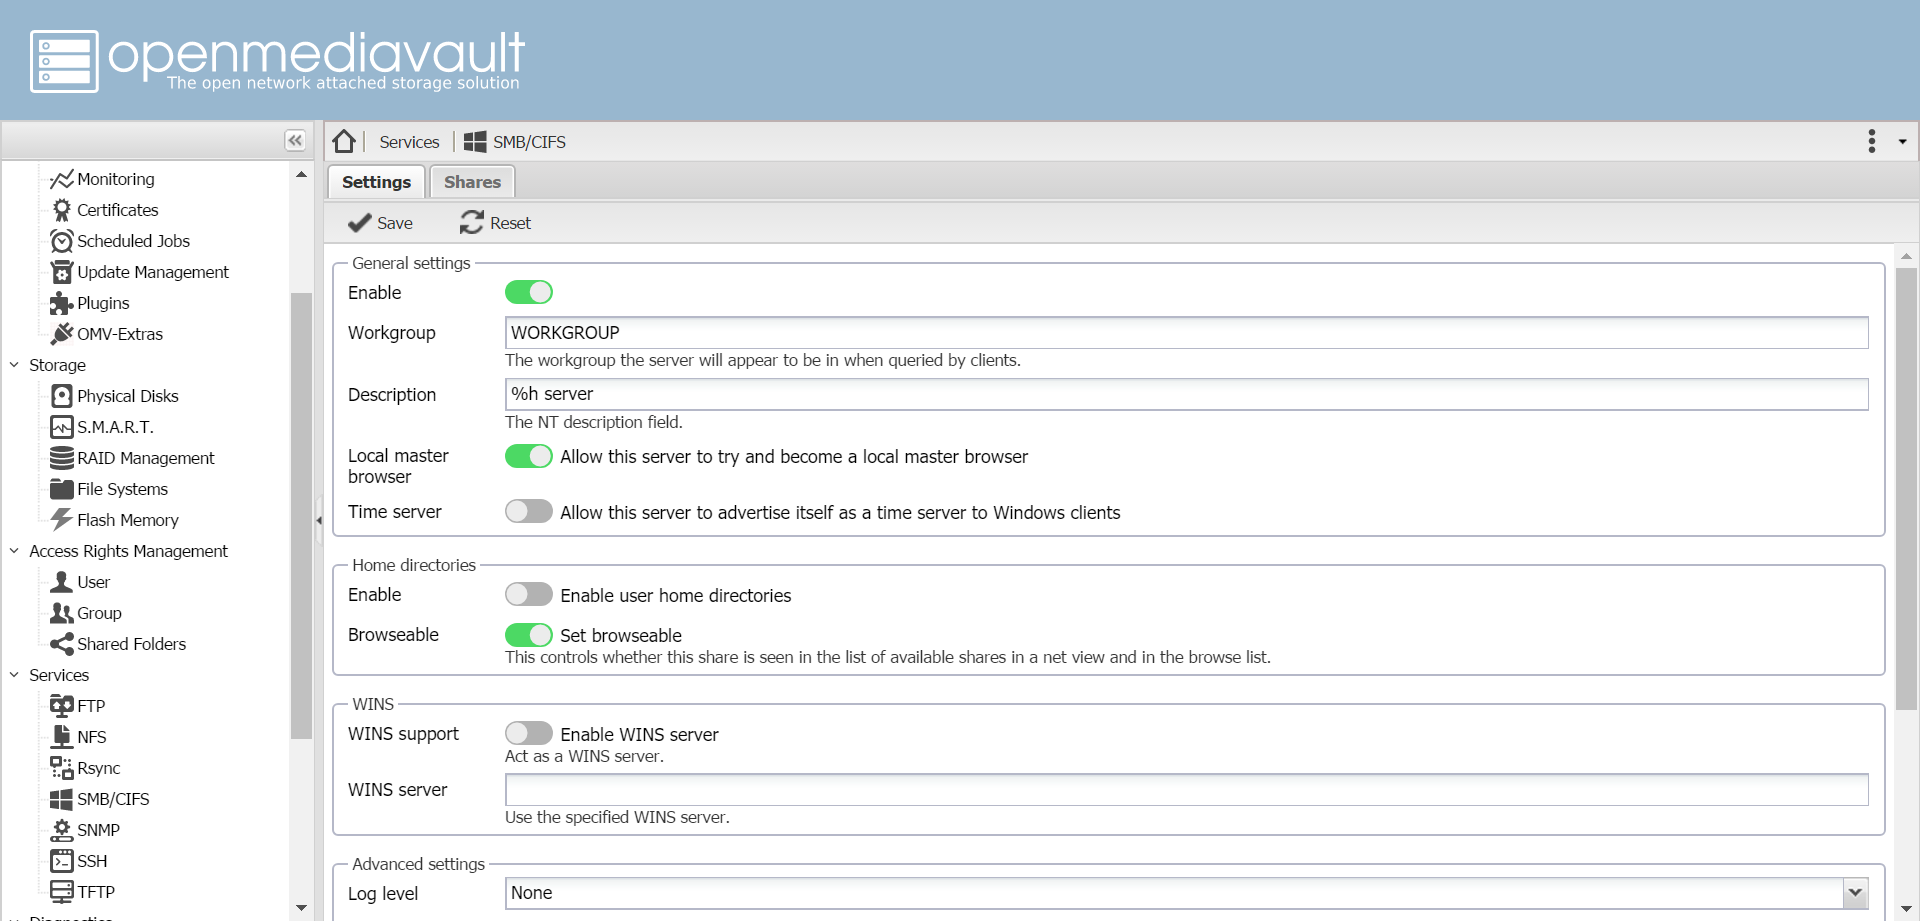
Creating shared folders was only half the battle. Now we need to enable SMB/CFIS so that other computers on our network can reach our shared folders. This is easy: back at the main menu, click SMB/CFIS (under Services) and turn on the option labeled Enable. Then hit Save and, after a moment, Apply.
There are two tabs to the SMB/CFIS menu. We’ve been on Settings, but hop over to Shares by clicking the labeled tab. Click Add and then, in the drop-down menu, select the shared folder you created in the last step. Click Save, then repeat as necessary until all of your shared folders are actually shared!
Step 8: Add users
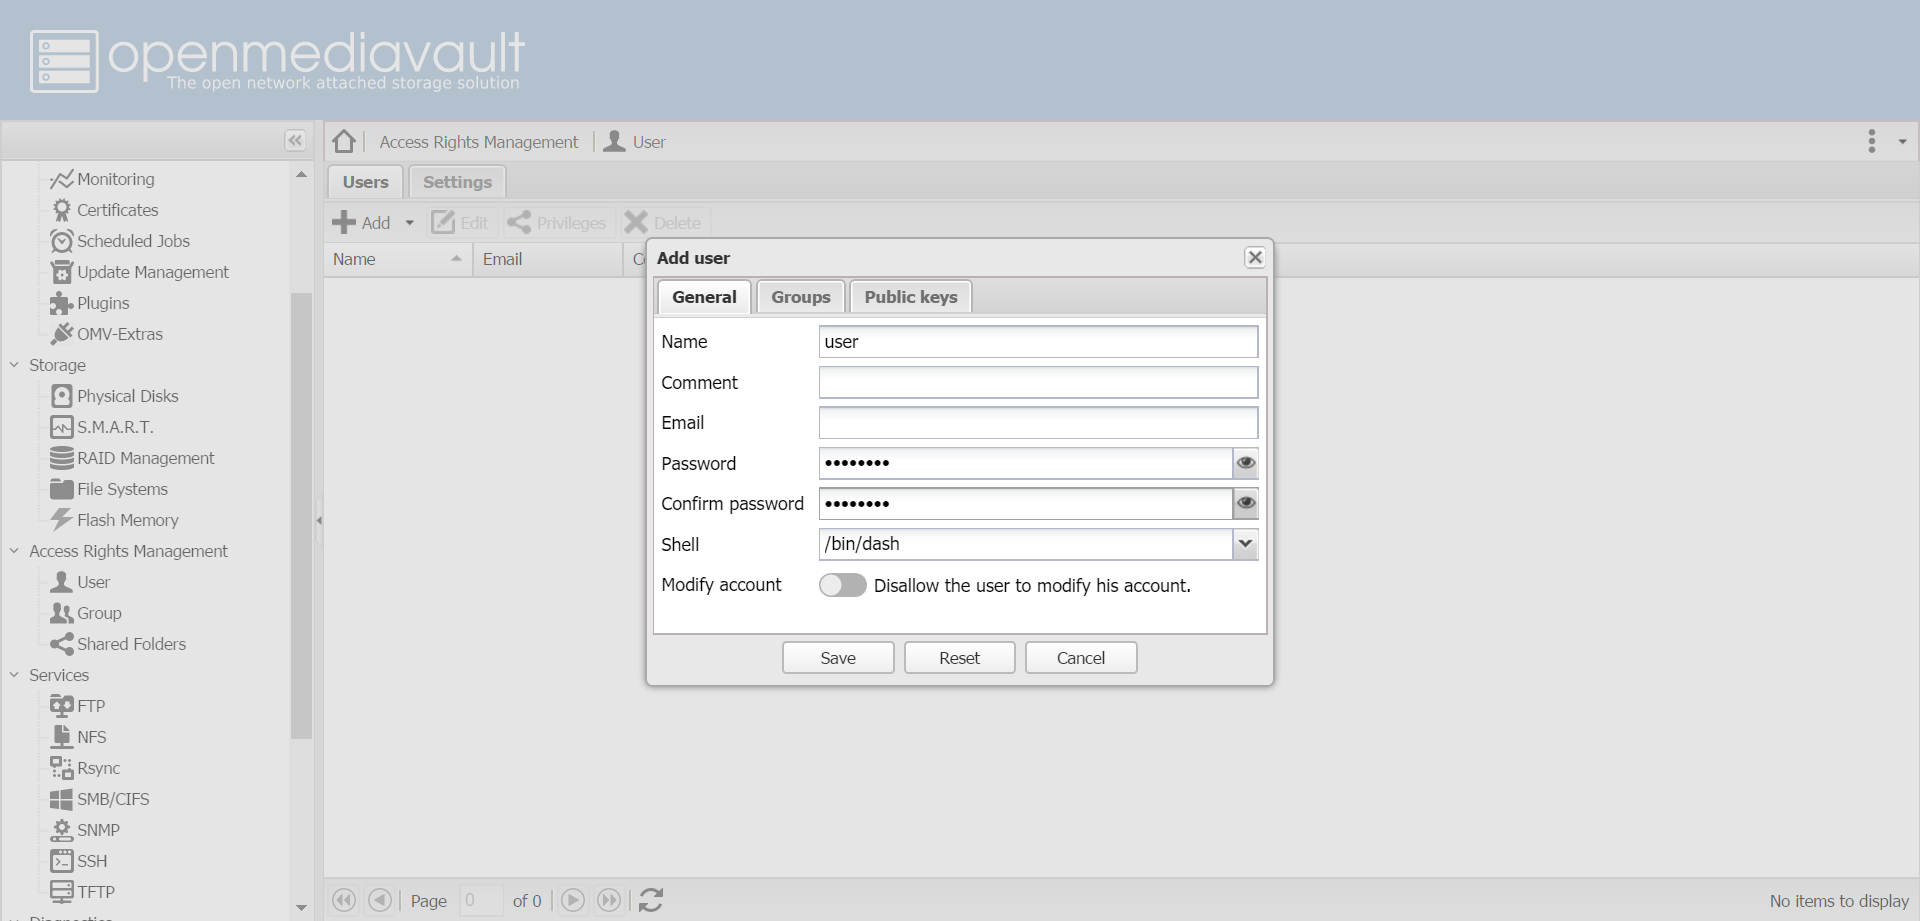
You can add multiple users to OpenMediaVault, meaning you can set different levels of permissions for each. To add a user, click User under Access Rights Management on that main left-hand menu. Hit Add, give your user a name and a password (you can also add things like an email address if you’d like), and remember to hit Apply.
Step 9: Access your files
We’ve covered everything you need to do on the OpenMediaVault side of things. Now let’s talk about the PC or Mac you’re using to access these files. In both cases, you’ll need to map the new shared drive from your computer.
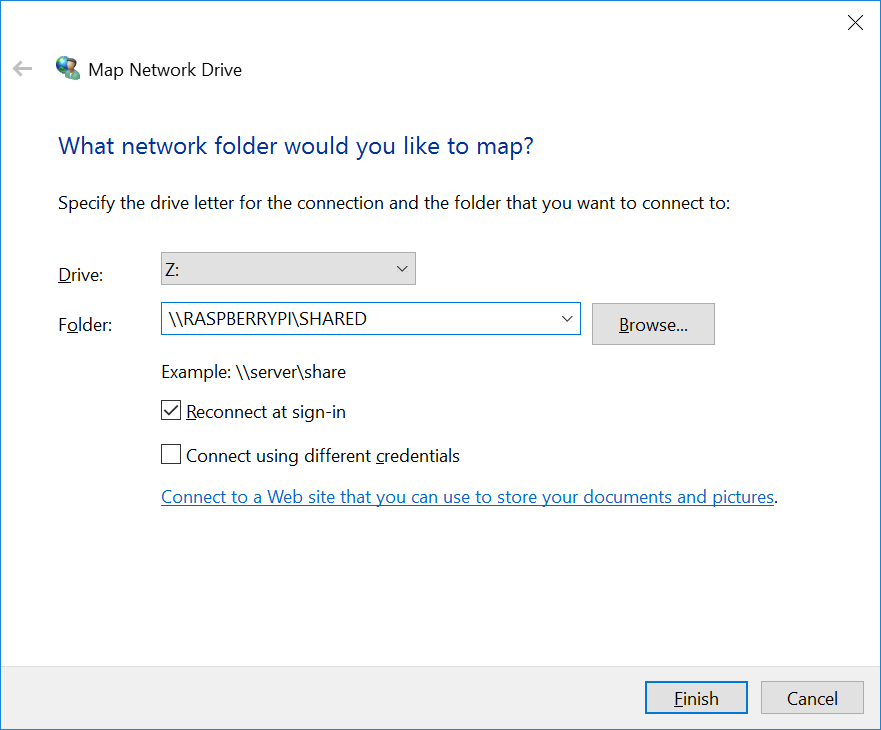
On PC, you’ll need to use File Explorer. Click on This PC, then the Computer tab, then Map Network Drive. You’ll need to choose a drive letter from the drop-down box next to Drive – you can use any letter not already in use. In the Folder field, type the path to the network drive. It’ll be \\RASPBERRYPI\[folder], where [folder] is the name of your shared folder. Hit Finish and log in with the credentials you created in Step 8.
On Mac, use Finder. Type Command + K to get a window labeled Connect to Server. Type smb://raspberrypi into the Server Address field (you can also use the IP address instead of “raspberrypi”). Then hit Connect, choose the volumes you want, and hit OK.
That’s it! Your NAS is now fully up and running. Of course, this guide doesn’t cover absolutely everything you can do with OpenMediaVault. To get the most out of the program, I’d encourage you to check out the OpenMediaVault wiki.
Hi,
I have Windows 7 and Windows 10 on my network. When I installed and OMV for the first time, I could read/write on the storage device but after a while I got a notification that I don’t have permission to open the shared folders. I’ve tried to re-install the software a couple of times following the exact procedure written here but I have no luck.
I have a Raspberry Pi 3 and the latest OMV software.
Linux Mint with LXDE – how do you map a network drive on Linux Mint?